BipedPlus
Ep.12 — Bone Mirror
Download Markdown Download with Images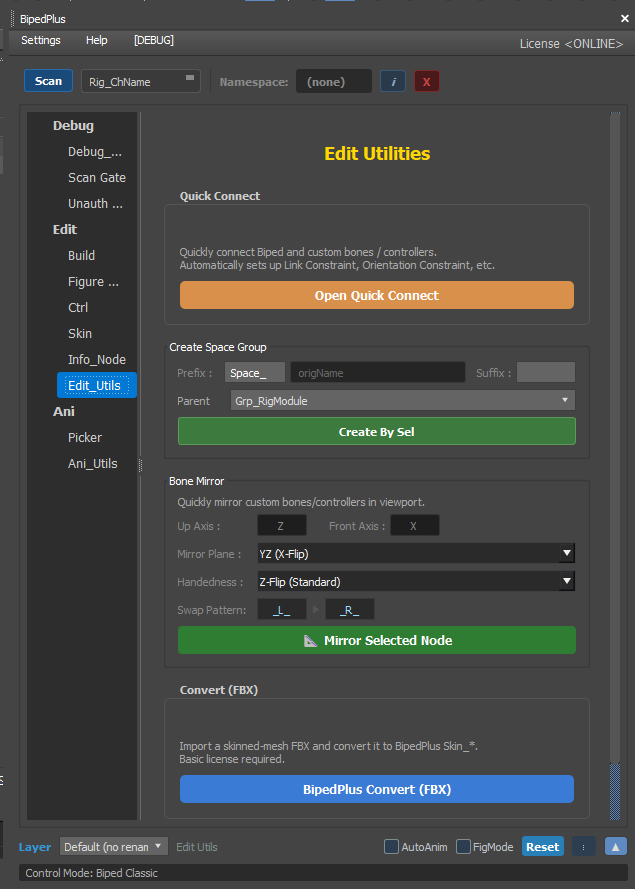
Overview
Used to copy additional bones made on one side to the opposite side.
Explains how to use BipedPlus Edit Utils → Bone Mirror instead of the 3ds Max default Bone Mirror, which tends to produce misaligned results.
Bone Mirror = bone placement/creation stage. Left↔Right pose copying is done in Ani Utils (Ep.9·14).
Max Default Bone Mirror — What's Inconvenient
- Mirrors based on the selected bone's pivot (origin), which often results in misalignment rather than a true reflection across the character's center (X=0).
- Fixing it requires manually calculating world X coordinates — which is tedious.
BipedPlus Bone Mirror — How to Use
Open Bone Mirror in the Edit Utils area.
Options (simplified)
| Option | Meaning |
|---|---|
| Mirror Plane | Mirror plane — usually the YZ plane (= left↔right flip from the character's front) |
| X Flip | Flip along the X axis |
| Headless Axis | Which axis to rotate around during mirror — usually Z for Biped. Keep default recommended |
        │ Mirror Plane (YZ)
   Left │ Right
   ────┼────
        │
Steps
- Select all bones that will be the mirror source (usually the Left side chain).
- Hierarchy → Parent — to preserve the child bone structure (may need to lock Parent manually at first).
- Execute Mirror.
- Verify that Left / Right names changed per convention.
- Move them and test that the Z-axis rotation etc. is symmetrical.
When to Use
- When creating custom Hair/prop bones on one side (like Ep.11) and cloning to the opposite side.
- For front-based symmetry instead of the Max default Mirror.
Notes
- If Hierarchy Parent is not set correctly, the parent may detach or the tree can break.
- Do not casually change Headless Axis.
- Rigging Info Update after mirroring (Ep.10).