BipedPlus
Ep.2 — Figure Mode 1 · Character Proportions & Bone Placement
Download Markdown Download with Images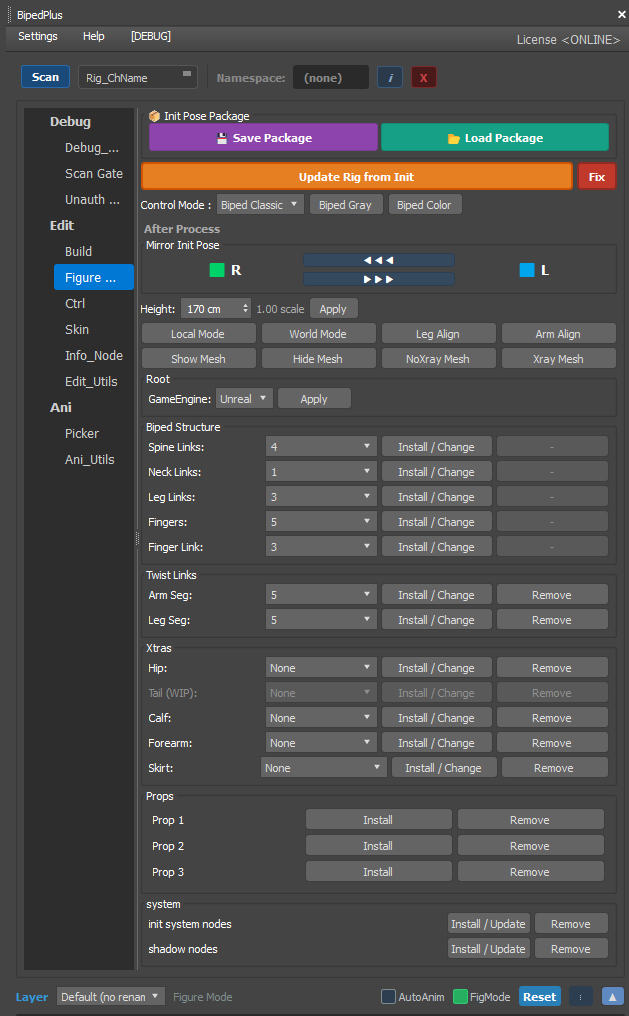
Overview
This is the step of aligning the skeleton created with Build to visually overlap the character mesh.
In Figure Mode, you adjust the overall scale, leg and foot joints, left/right mirror, and Hip position.
Figure Mode = A work mode for "placing this rig to fit this character's body." It is a required step immediately after Build.
Prerequisites
- A rig with Build completed in Ep.1
- Character mesh present in the scene
Step-by-Step Guide
1. Entering Figure Mode · Overall Scale
- Navigate to the Figure Mode tab.
- This is the initial joint placement phase right after Build — you can later save and reuse Init data in Figure Mode.
- Adjust the overall character scale (e.g., 0.9).
- Use wireframe display to make it easier to compare mesh and bone positions.
- Fine-tune to something like 1.03 if too small — proceed to the next step once roughly aligned, even if not perfect.
2. Default Figure Options
- When the default Figure options are checked, the default position data of Biped Figure is saved and applied.
- It is recommended to keep them checked by default.
3. Joint Placement (Hiding the Mesh)
- Hide the mesh or use Figure Mode's default settings (hide mesh and layers) for working speed.
- Toggle wireframe and mesh display from the layer area at the bottom as needed.
- Use the move joint button to align each bone position to the mesh joints.
4. Thigh — Box Controller Placement
Important: Place based on the Thigh box controller, not the Ankle.
- Work on leg joints primarily in the Front view.
- Align the Thigh box controller position to the mesh leg joint.
- If the character is asymmetric, align one side first then use Mirror for the other side.
5. Foot Settings
- Align the Ankle Ball position.
- Set the Toe height to 0.
- Check foot and leg alignment from the Front view.
6. Align · Mirror · Update
- Work in the Front view. (If the team has a set rule like T-Pose or A-Pose, align to that default pose.)
- Align — check that left and right are symmetrical.
- Mirror — if only one side has been aligned, copy the same placement to the other side.
- Use 3ds Max snap (90°/180°) to verify joints are standing straight.
- Press Update (or Update from Init) to save and apply all adjustments made so far to the rig.
→ If you skip this step, when you exit Figure Mode it may look as though it has reverted to the original. - Verify that the placement is maintained even after toggling Figure Mode off and on again.
7. Hip Placement
- The Hip is positioned at the point where the Pelvis and Thigh meet.
- Use the Hip-specific view and adjustment in Figure Mode to check that the connection with the leg looks natural.
- Test whether moving the Hip causes the Thigh to move in sync.
Tips
- If there is a production pose rule like A-Pose, aligning it precisely is better for subsequent skinning and animation.
- The habit of aligning one side first before mirroring saves time.
- If you accidentally moved the Thigh box instead of the Ankle, re-align based on Thigh again, then Update.
Notes
- Even one misaligned joint affects the overall body shape and skinning — align from the big picture in order: Pelvis → Spine → legs.
- Exiting Figure Mode without Update may result in adjustments not being saved — make step 6 above a habit.