Ep.5 — Skin Tab · Bind Pose · Quick Skin
Download Markdown Download with Images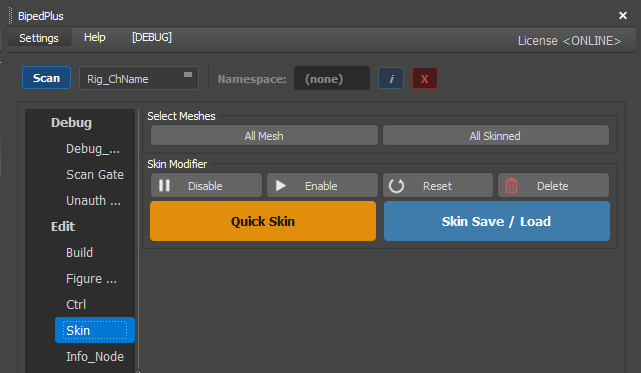
Overview
This episode was reshot because the earlier Skin video received an update.
The Skin tab is not a screen for painting weights. It is a management screen: select, disable, reset, delete, assign bones, save / load.
Before you start:
- Joints are already placed from Ep.1–4
- The demo scene is already skinned
- Weight painting is SkinLayer Studio or another skinning tool (Ep.6)
Prerequisites
- BipedPlus Build has created
Skin_*bones - Disable / Enable / Reset / Save Load: meshes that already have a Skin Modifier
- Quick Skin: meshes to skin for the first time, or to add missing bones
All Mesh · All Skinned
These are Layer-window buttons.
| Button | What it does |
|---|---|
| All Mesh | Select every Mesh in the Scene |
| All Skinned | Select only meshes that have a Skin Modifier |
Dummy is not selected. It exists to group the Modeling Group.
Bind Pose check — Disable / Enable
Bind Pose is the start pose before bones move. Confirming it is critical.
- Select the mesh, then Disable — the Skin Modifier turns off. The biped can move; the Mesh stays.
- Turn it back on with Enable.
- If the Mesh pops when you toggle, Bind Pose is wrong.
Common causes:
- Joints are not exactly on the original pose
- You added a Skin Modifier on an animated pose
If the pose is correct, Enable/Disable will not pop.
Reset
Figure Mode joint placement is human work, so it is never perfect. If you move joints after skinning, Bind Pose drifts.
- Disable on the Skin tab so joints are easier to see.
- Fix the joints, then Enable.
- If the Mesh is off, Reset in All Pose.
Reset sends the Mesh back to its original place.
Check: All Mesh, then Enable/Disable again — no pop means it is aligned.
Delete
To start over, All Mesh → Delete removes every Skin Modifier. The Mesh no longer follows.
Caution: This is hard to undo. Save first.
After Delete you are in a state similar to first entering the Figure tab.
Where to define skinning
A frequent question.
- Define all Skin Layer items in the Layer window
- Or under Hierarchy Root Bone — the engine-ready tree. Put all Skin Bones here.
Then assign bones and add Skin.
You can add every bone, but using the documented set is better for optimization.
B.1 — Skin Bones Base Reference: Is Skinned = bones that should be on the Mesh.
Spine goes on Spine Seg, not the main bone. Running Scale Squash on the main bone can explode the Mesh in-engine, so Scale lives on Seg. Circled items on the Bone List are the targets.
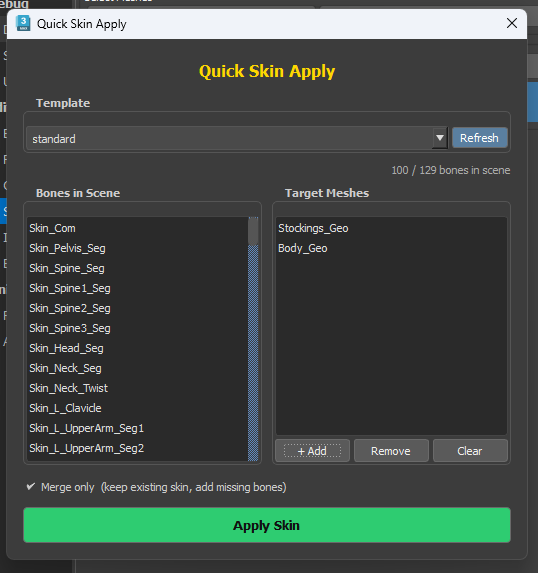
Quick Skin
Use this when checking the Bone List one by one is too slow. The circled recommended bones are already in the list.
- Open Quick Skin and put meshes into All Skin (Target Meshes). (
+ Add) - Press Apply Skin (Apply to Skin). It takes a moment.
- The recommended Bone List is assigned automatically.
This is a first pass. The older video tore a lot on playback. Voxel Algorithm now keeps the first pass more stable. Detail still needs hand work. → Ep.5.1
Then clean Weight toward 1. Classic 3ds Max Weight, Envelope, or another Skinning Tool are all fine.
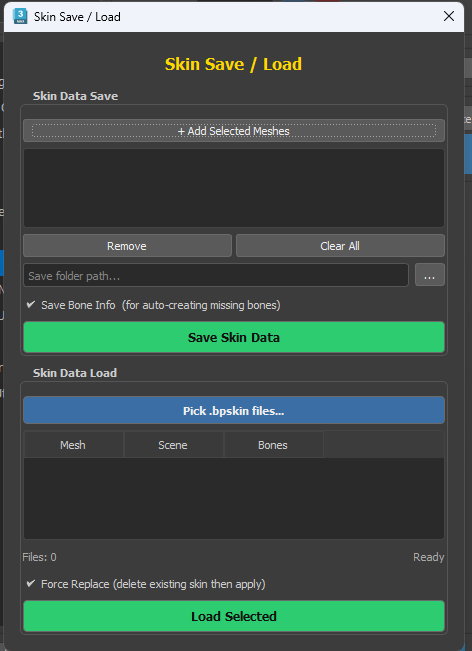
Save
When skinning is done, save it. Open Skin Save / Load.
- Add meshes (+ Add Selected Meshes) and pick a folder.
- Save Skin Data (Save)
What gets written:
| Format | Contents |
|---|---|
| ENV | Classic 3ds Max Skin Data Format |
BP Skin (.bpskin) |
Links and bone info, including where to add a missing bone |
The Save Bone Info (for auto-creating missing bones) option is that extra data.
Load
The video deletes Weight, then restores it.
- All Mesh, then Skin Save / Load (no need to re-select meshes)
- Open the saved BP folder (Pick .bpskin files...)
- Found / Scene column = it is in this Scene
- Load Selected (Load Select) — Skinning comes back with the same Weight
3ds Max default skinning and SkinLayer Studio
Even after the Voxel patch, the first pass is not production-ready — you still edit by hand. Algorithm · One Volume · Bind/Add: Ep.5.1.
You can do that with classic 3ds Max Weight tools. Even for a professional rigger it feels vague, and there is no Maya-style Weight Lock. The video’s recommendation: do not rely on Classic Weight alone.
The workaround is SkinLayer Studio.
Buying BipedPlus includes a 3-month SkinLayer Studio subscription. Events may change this.
This is not a bundle upsell. While building BipedPlus it became clear that 3ds Max skinning is too hard, so a separate plugin was made. The full “why” continues in Ep.6.
Related
- Ep.1–4 — Build · Figure · Controller
- B.1 — Is Skinned · Spine Seg
- Ep.5.1 — Quick Skin · Voxel
- Ep.6 — Problems with Max Skinning / Why You Need SkinLayer Studio
- SkinLayer Studio